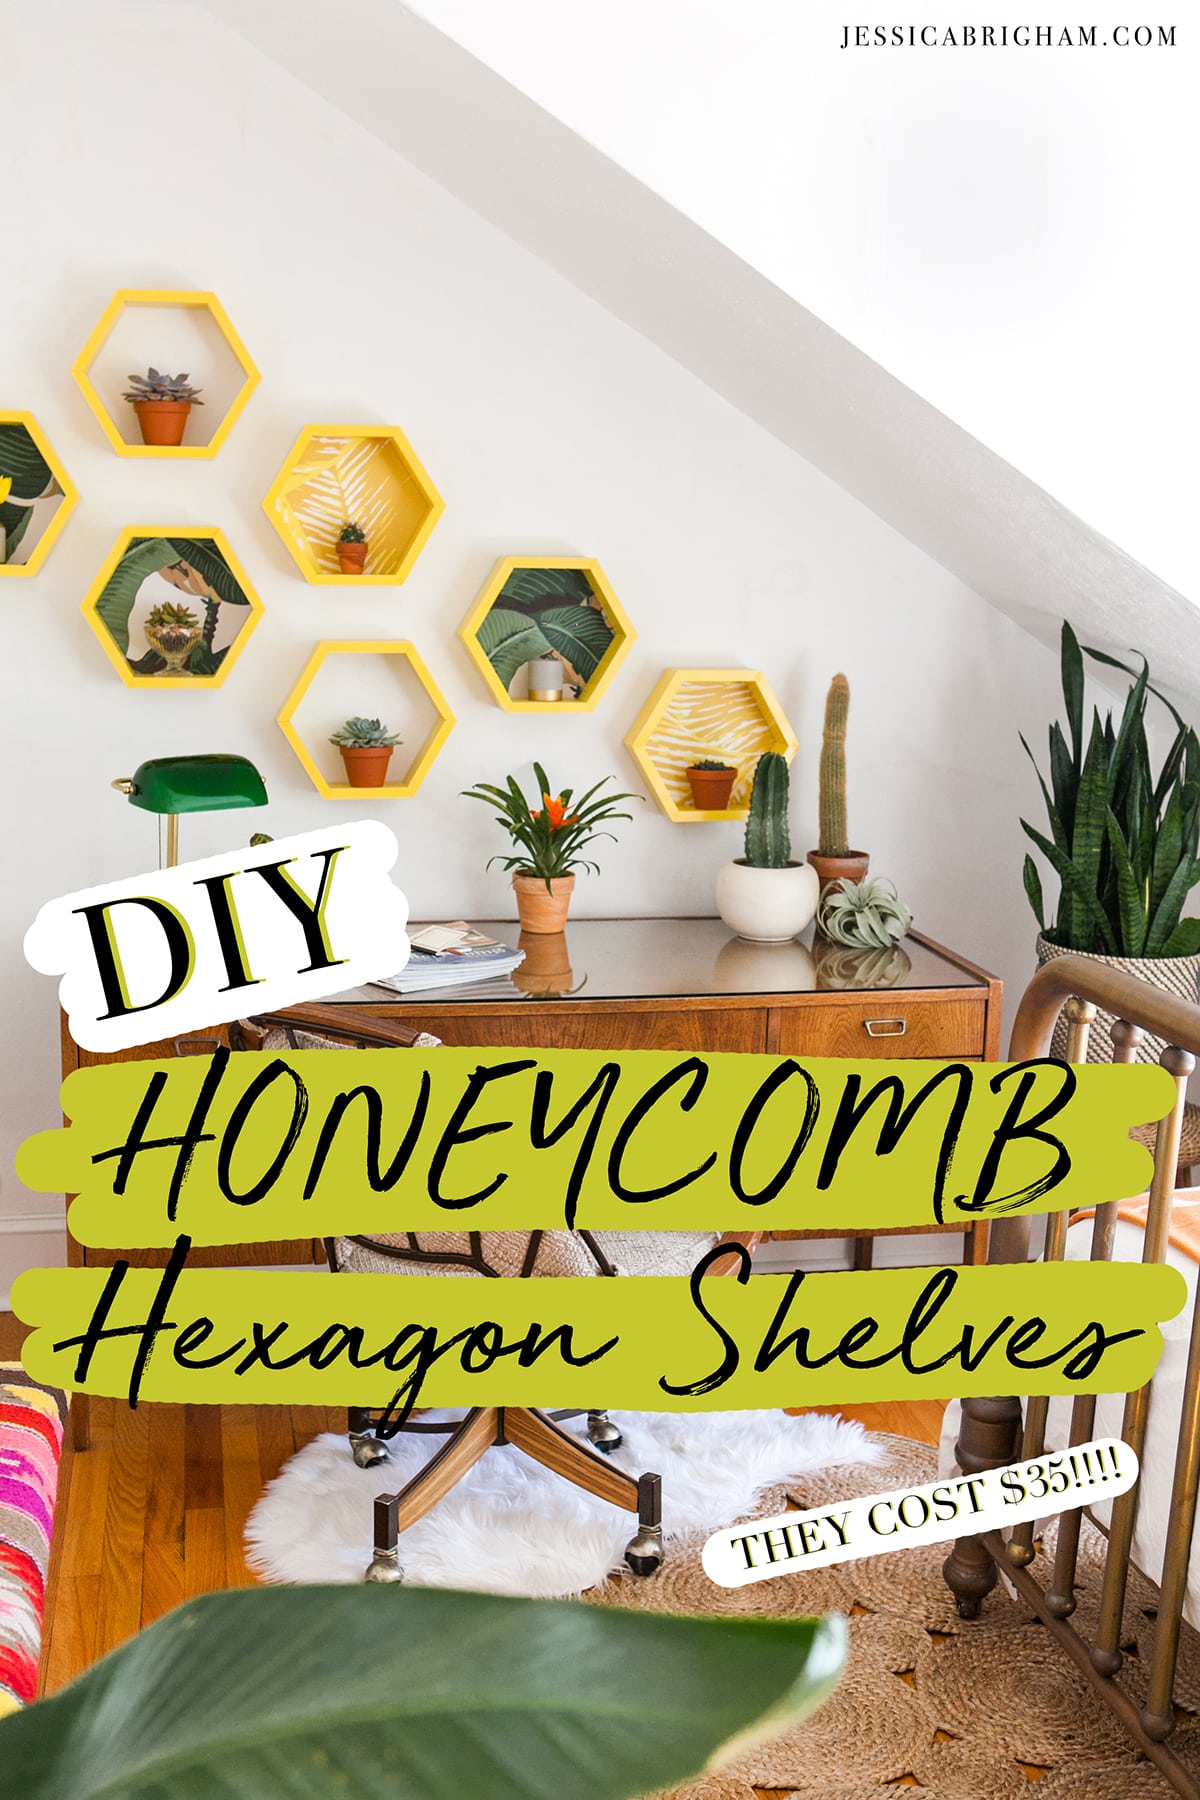
DIY Honeycomb Hexagon Shelves
Looking to create eye-catching floating shelves on a budget that double as wall art? Then this quick + easy DIY honeycomb hexagon shelves tutorial is for you!! These hip, geometric, electric yellow shelves are not only stylish (and style-wise not going anywhere soon IMHO), they’re painstakingly affordable, too. Supply cost spoiler alert: $35 smackeroos. 😱
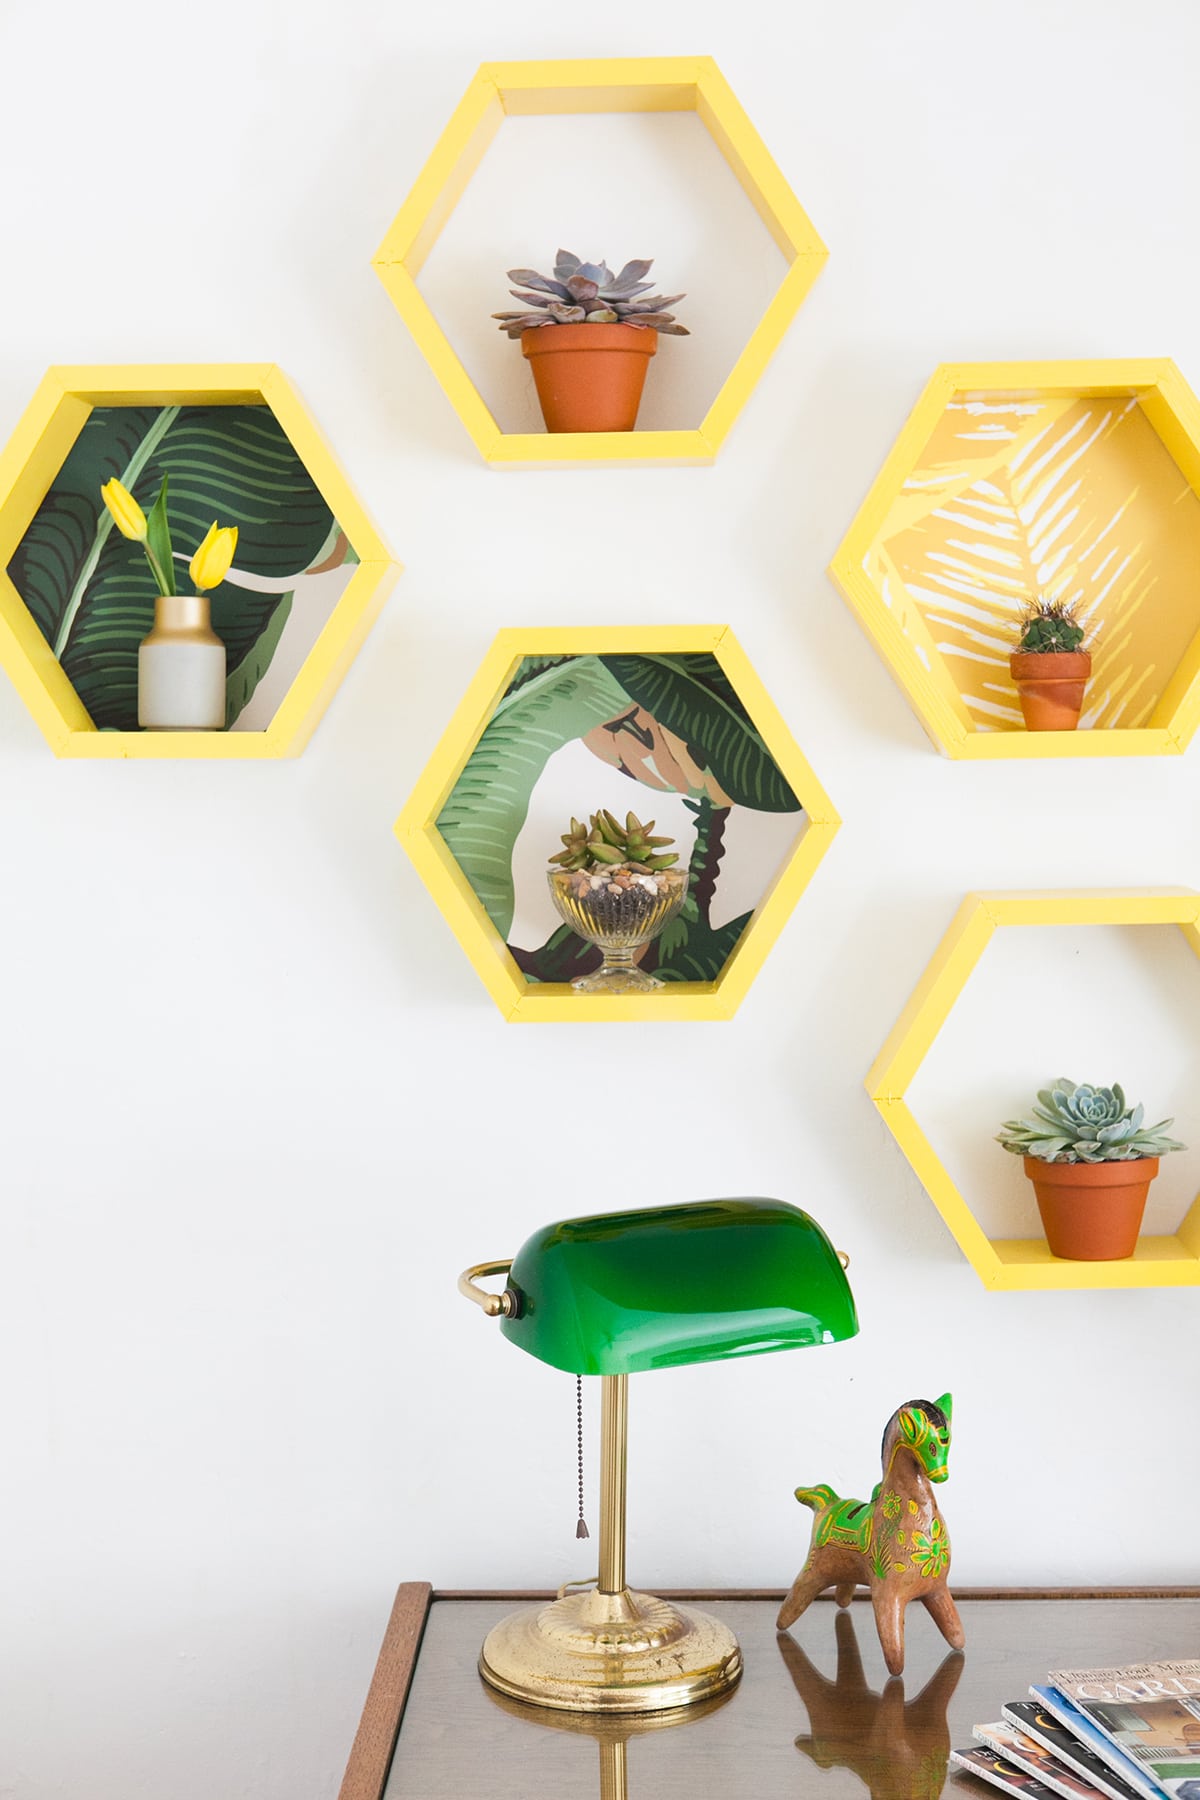
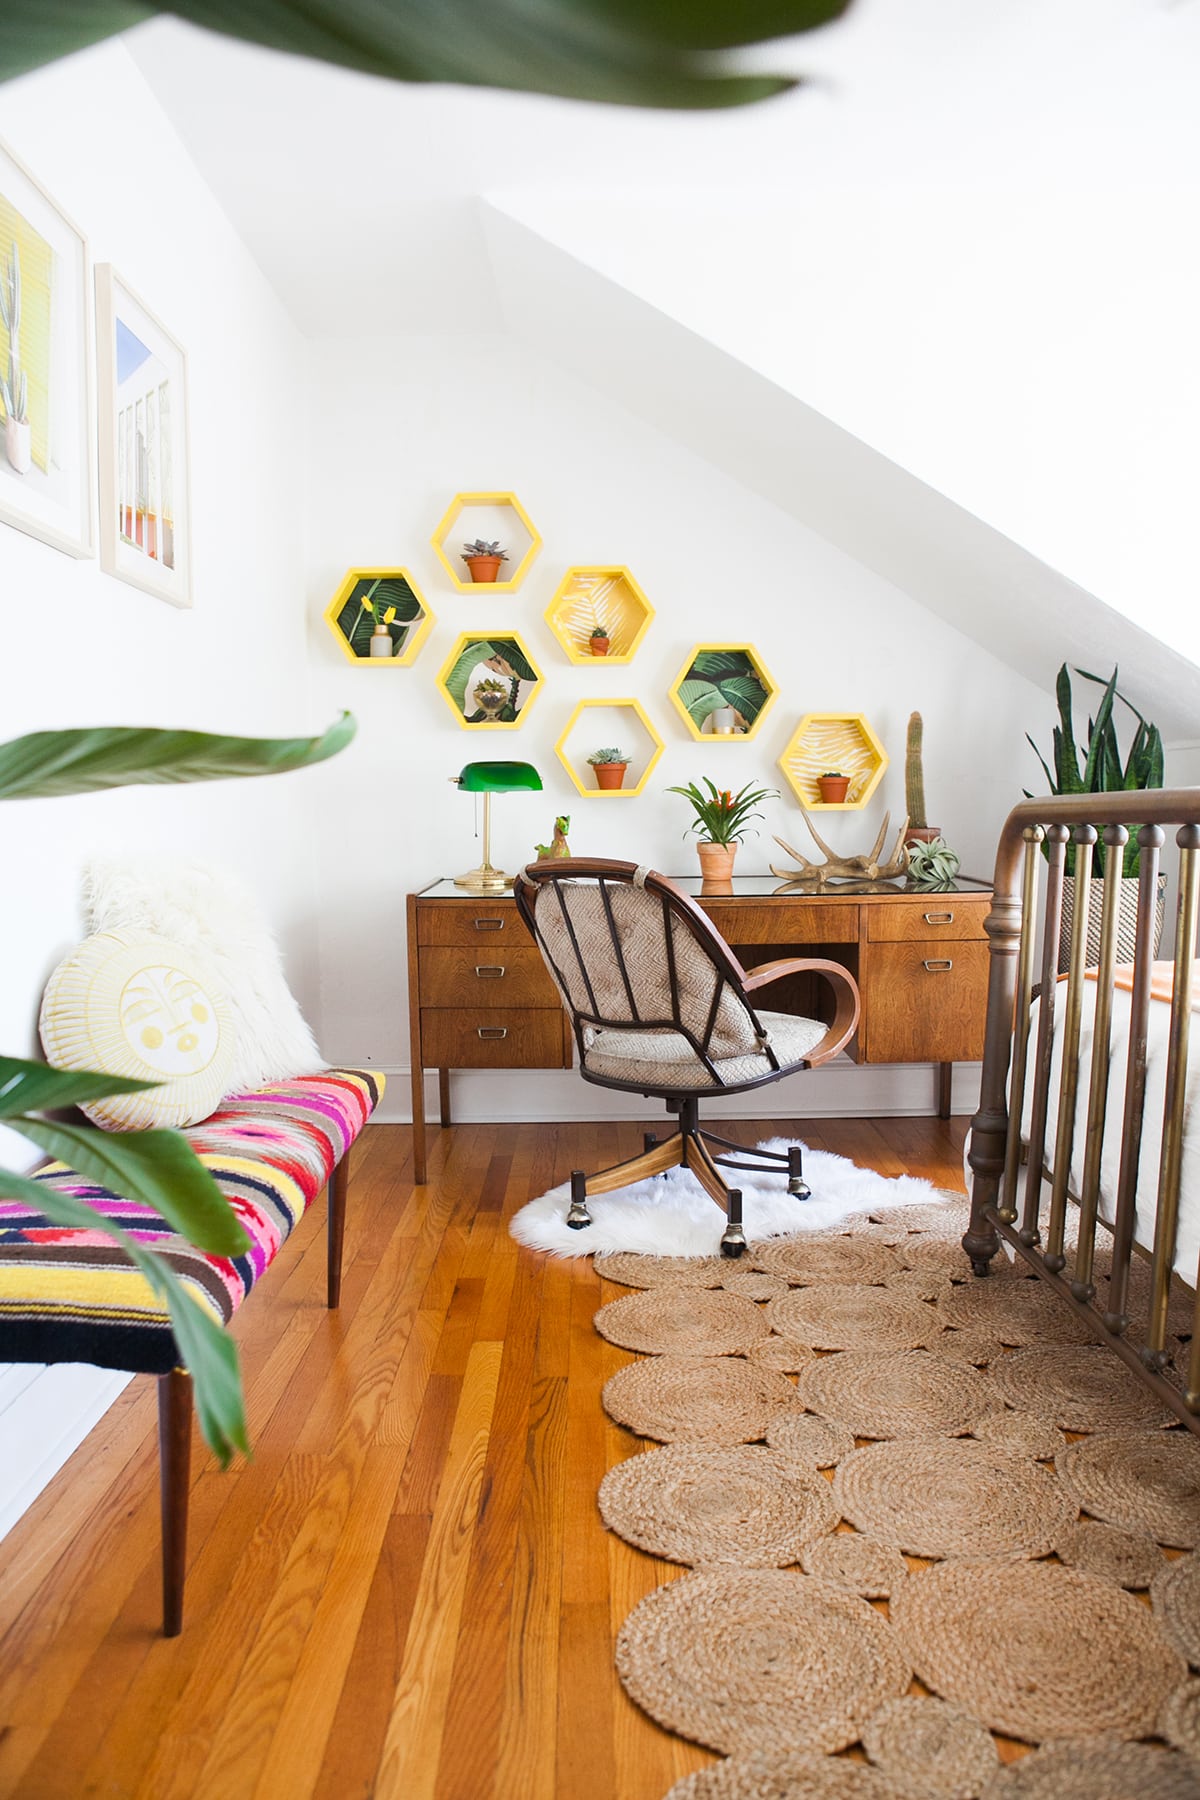
When I was designing my Desert Chic Guest Room + Hallway for the One Room Challenge, I sought to create a visually interesting succulent plant display. Inspired by a recent, vibrant voyage to Galway, these honeycomb hexagon shelves became the means-to-a-colorful-end.
WHAT YOU’LL NEED
Supplies for seven honeycomb hexagon shelves
(4) 1 in. x 4 in. x 6 ft. Common Boards
Krylon Spray Paint—Sun Yellow
Krylon Spray Paint—Primer
Miter Saw
Wood Glue
Staple Gun
10mm Staples
Wood Putty
220-grit Sandpaper
(7) Tack-in Sawtooth Hangers
(14) Adhesive Vinyl Bumpers
Hammer
Measuring Tape
Pencil
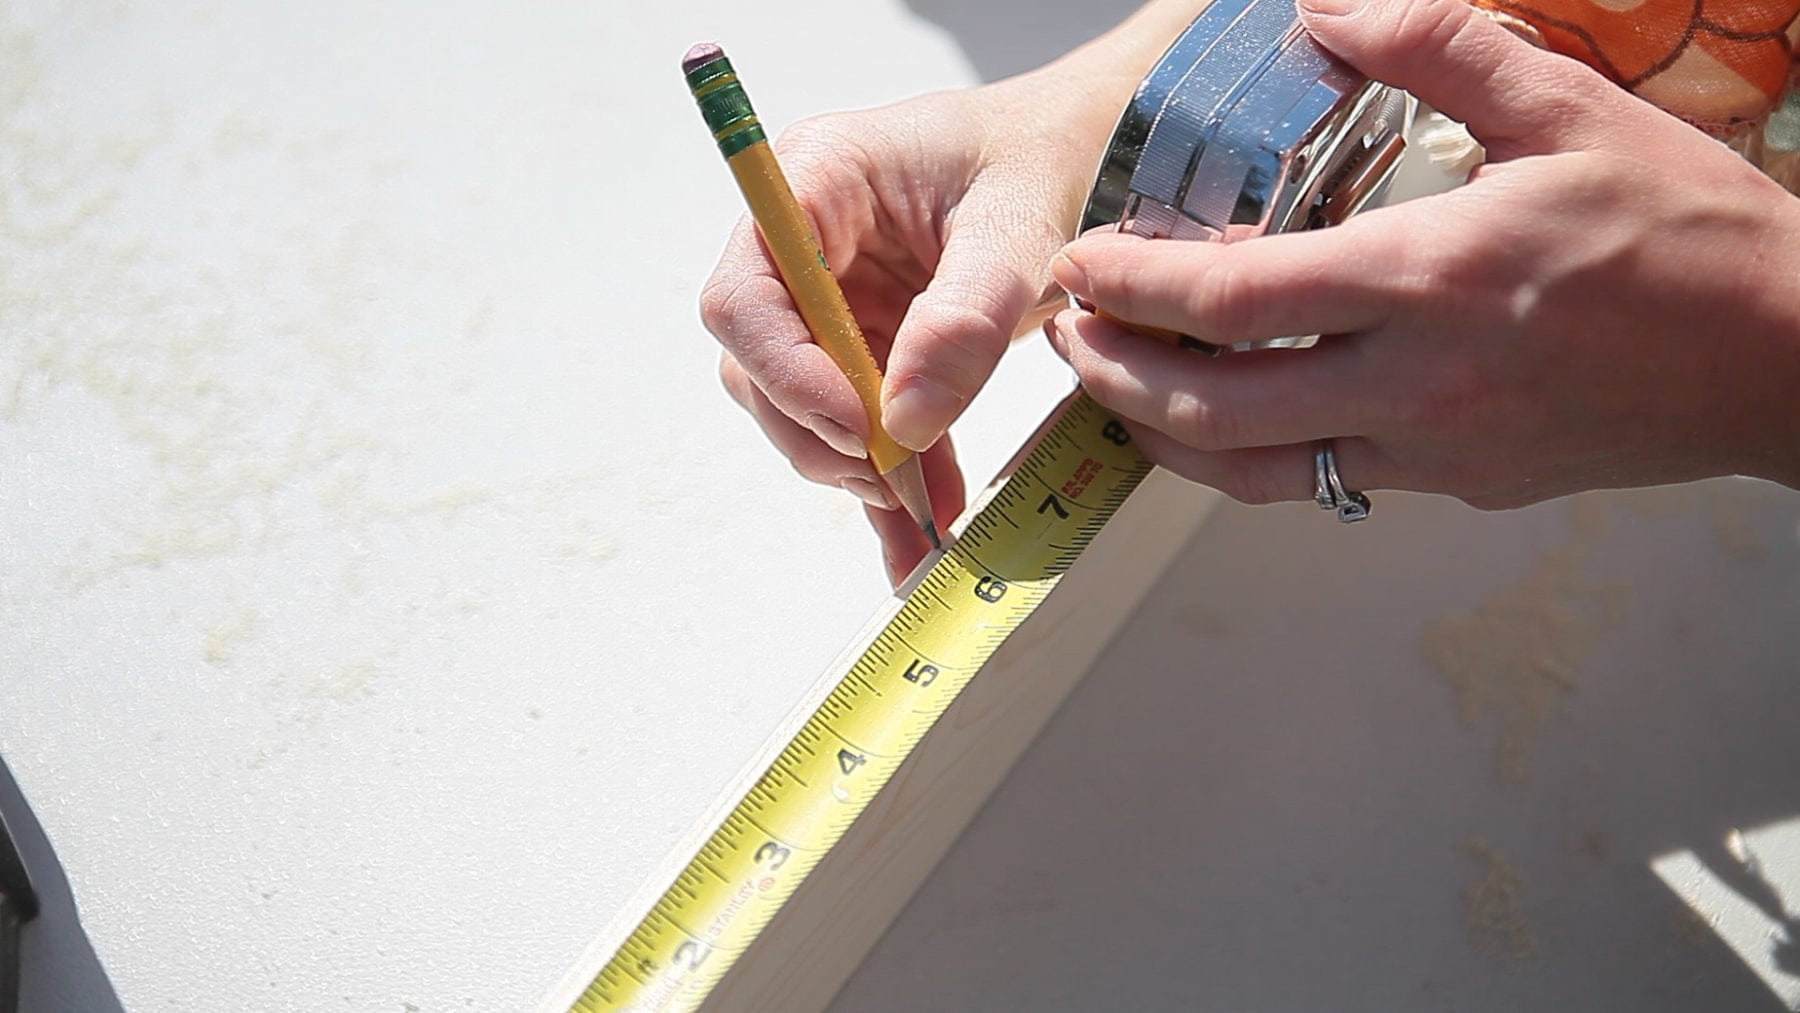
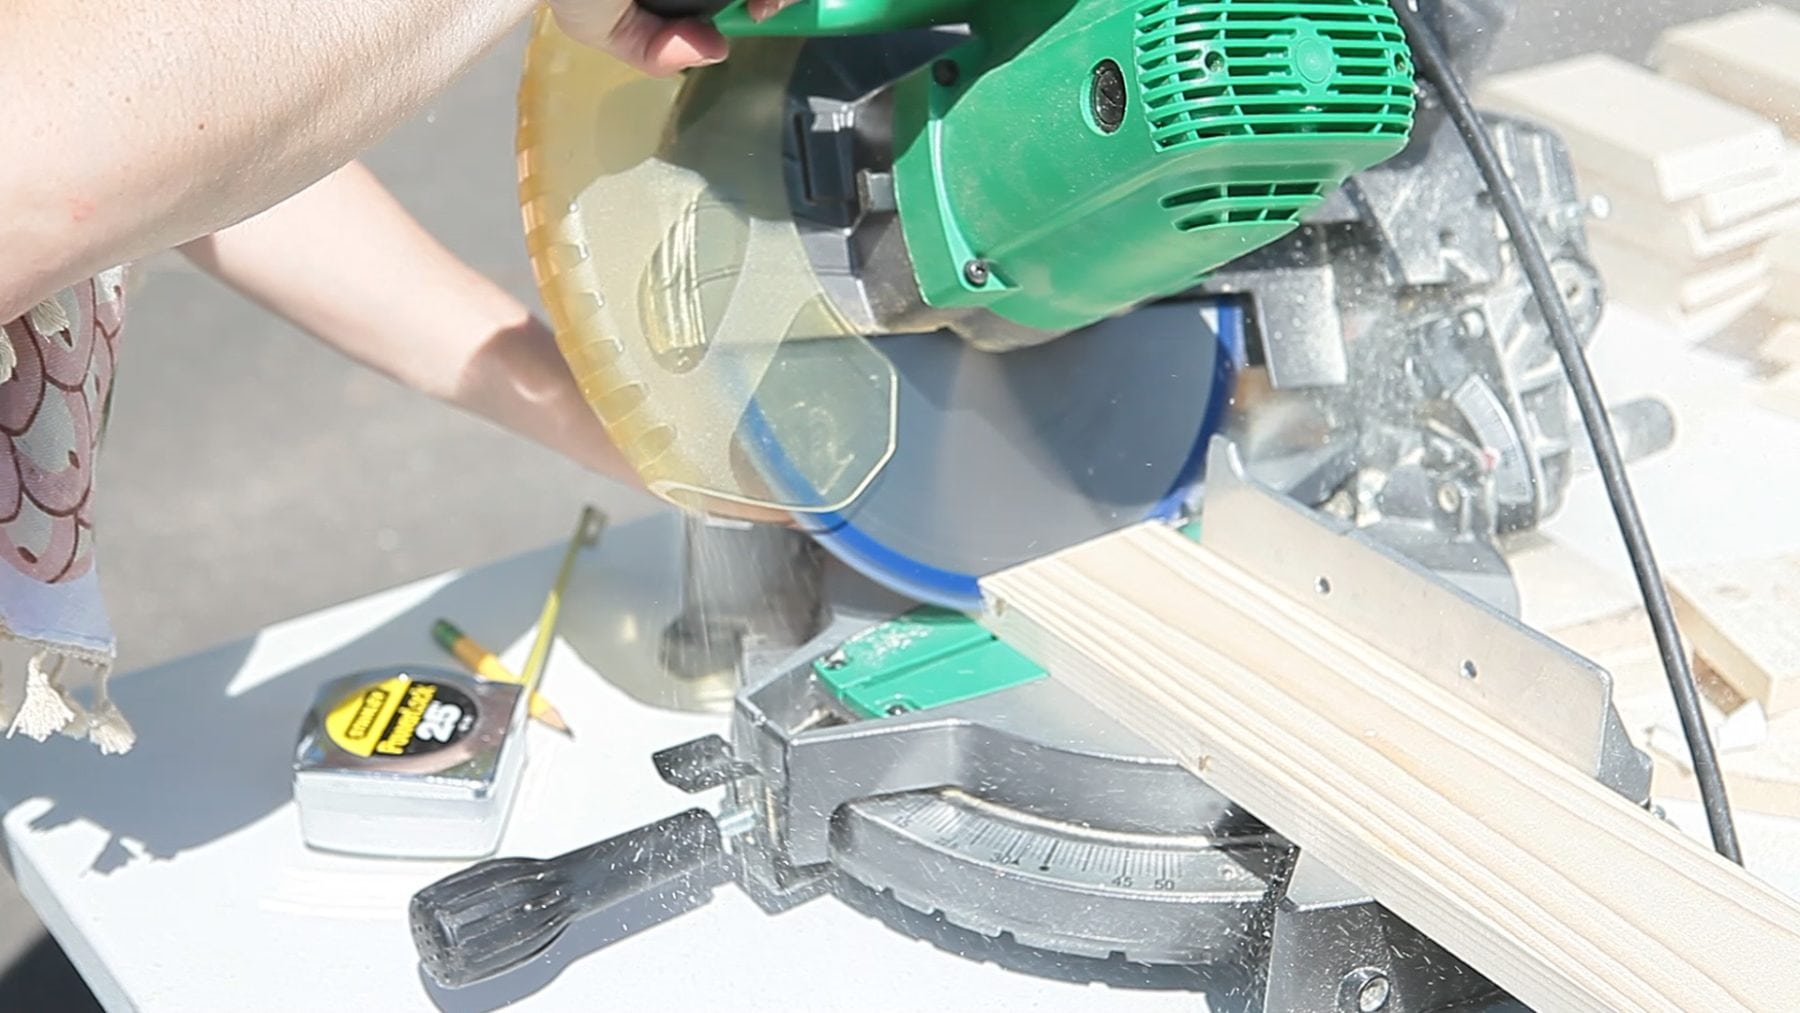
MEASURE TWICE, CUT ONCE
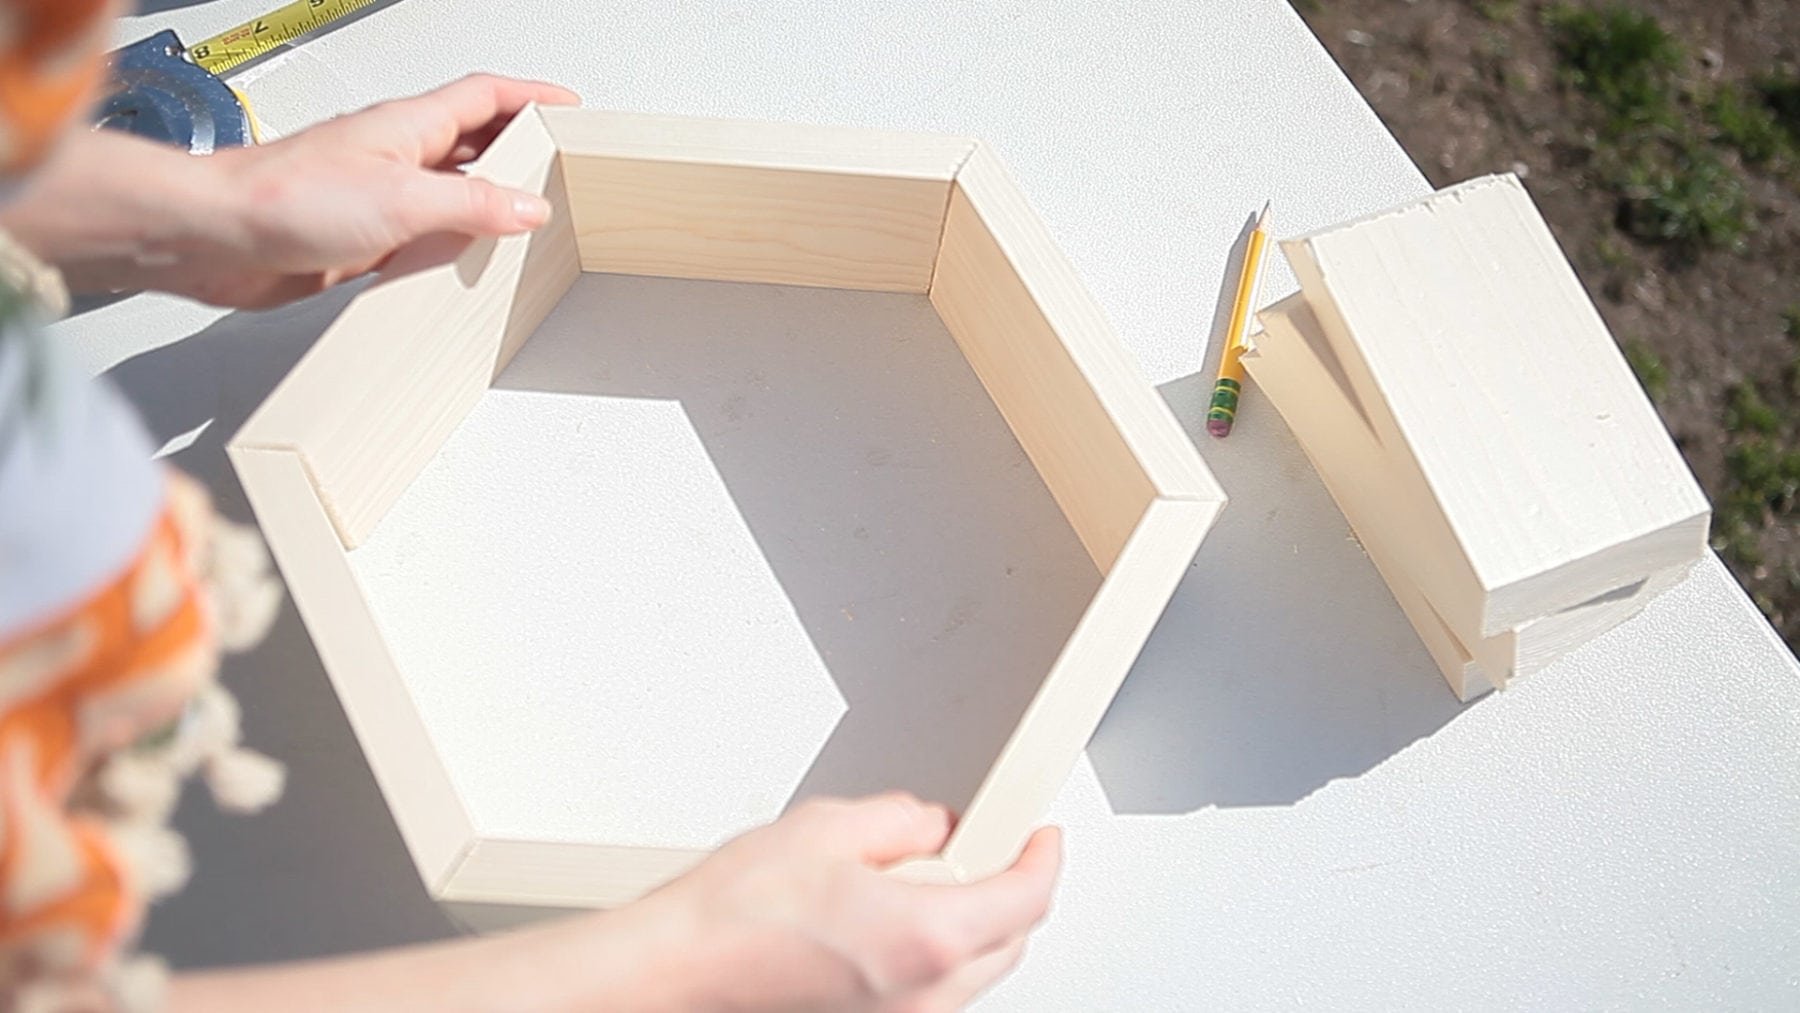
Set your miter saw to a 30-degree angle. Make the first cut close to the lumber edge. From the longest point, measure and mark 6-inches. Line up your 30-degree angle correctly (typically new saws have a laser assist!) and make that cut. Each shelf requires six wood planks.
HONEYCOMB, ASSEMBLE!!
Layout your shelf. Use a thin strip of wood glue to adhere each plank. Attach two sides and wide away excess glue. Use a staple gun to secure the backside with two staples, one for the front. Let wood glue dry for 24 hours. If you can control the strength of the staple gun, ensure the staples set deep into the wood to allot for wood putty.
FINE DEETS
Wood putty your staple marks and any other imperfections. Let dry at least 1–2 hours. Use a 220-grit sandpaper to smooth your wood shelves to the finish of a baby’s bottom. I’ll be honest; I skipped this step due to time constraints. I highly recommend it if you’re looking for a professional maker’s finish.

FINISHING
Dream big here! You can paint, stain or simply poly for a more modern look. I opted to spray paint to save on time and avoid those dreaded paint brush marks. I can’t recommend using a spray paint primer enough. Not only will it prep the surface of your project, it’ll make the color your decide pop like cray cray.
LET’S HANG
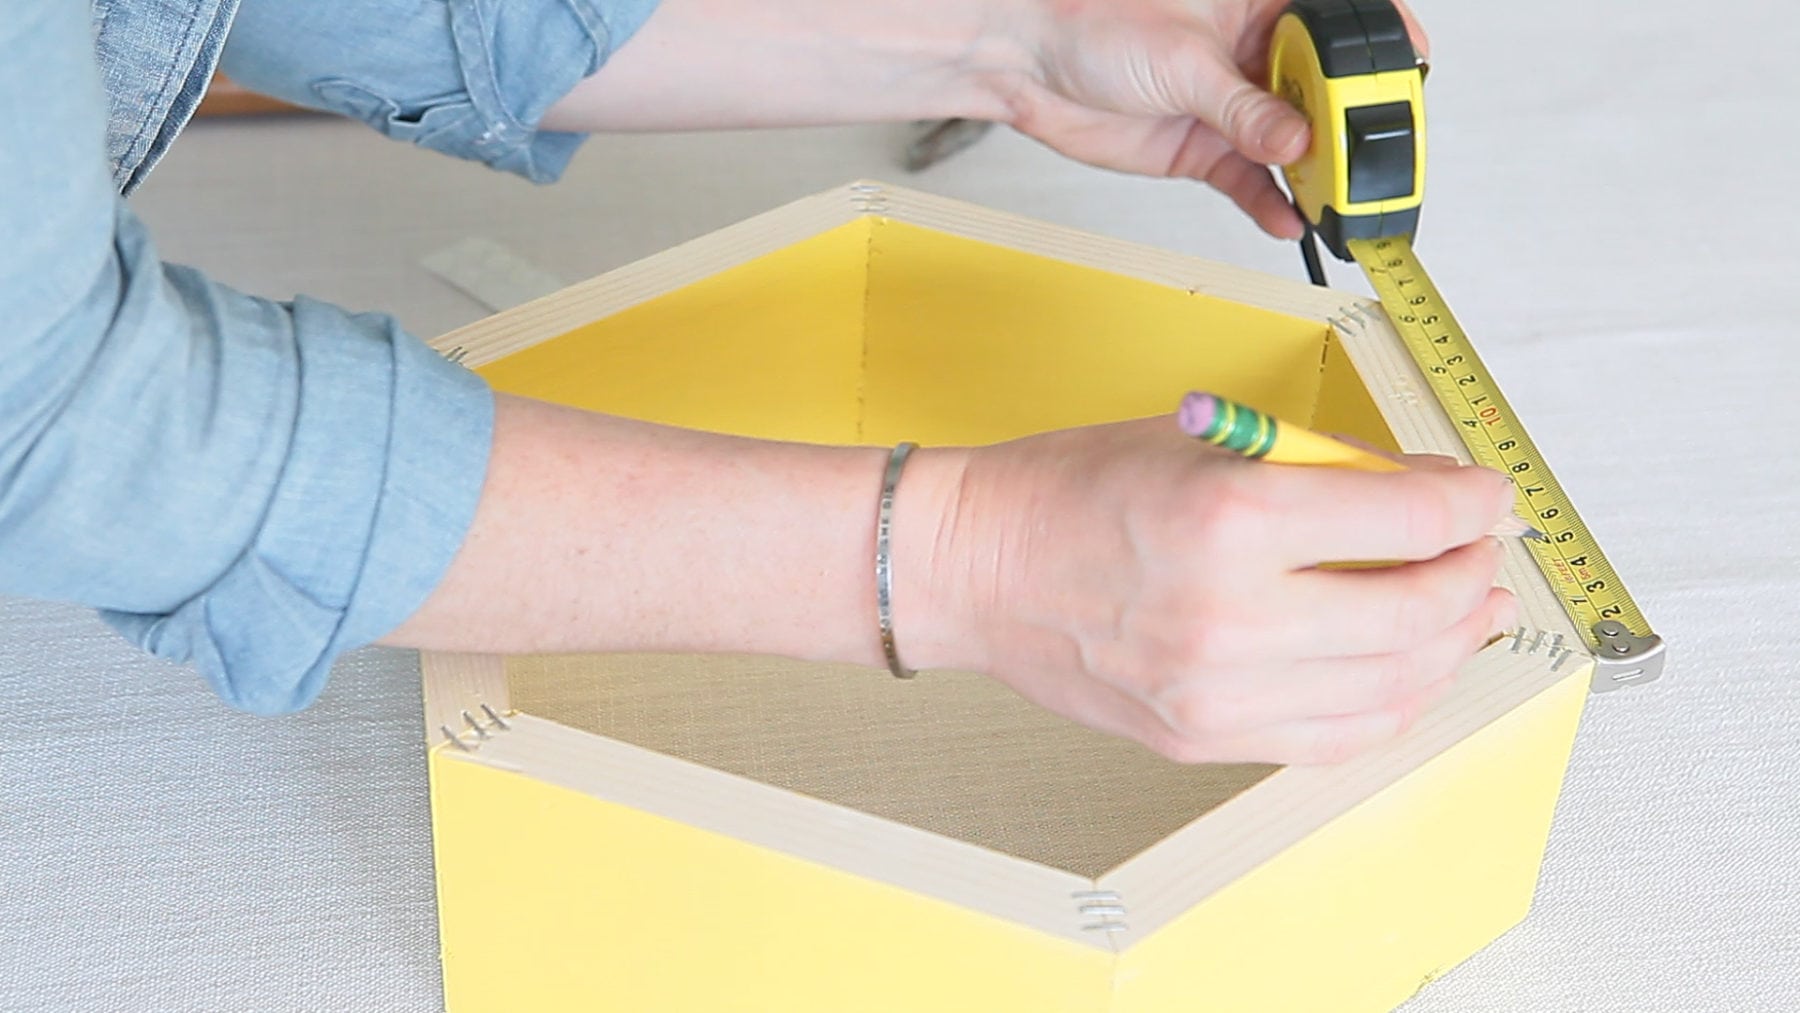
I hung my shelves with tack-in sawtooth hangers. Determine the top of the backside of your shelf and measure the center. Use a hammer to “tack-in” the sawtooth hanger. Add two adhesive vinyl bumpers to keep the shelf from bowing in as well as taut to the wall. Layout your shelves on the ground to determine placement. Start with the end and work you way over. Use a measuring tape to ensure proper placement.
PRO TIP: I hung my shelves separately from one another and at slightly varying heights and widths. This creates a natural, symbiotic feel.
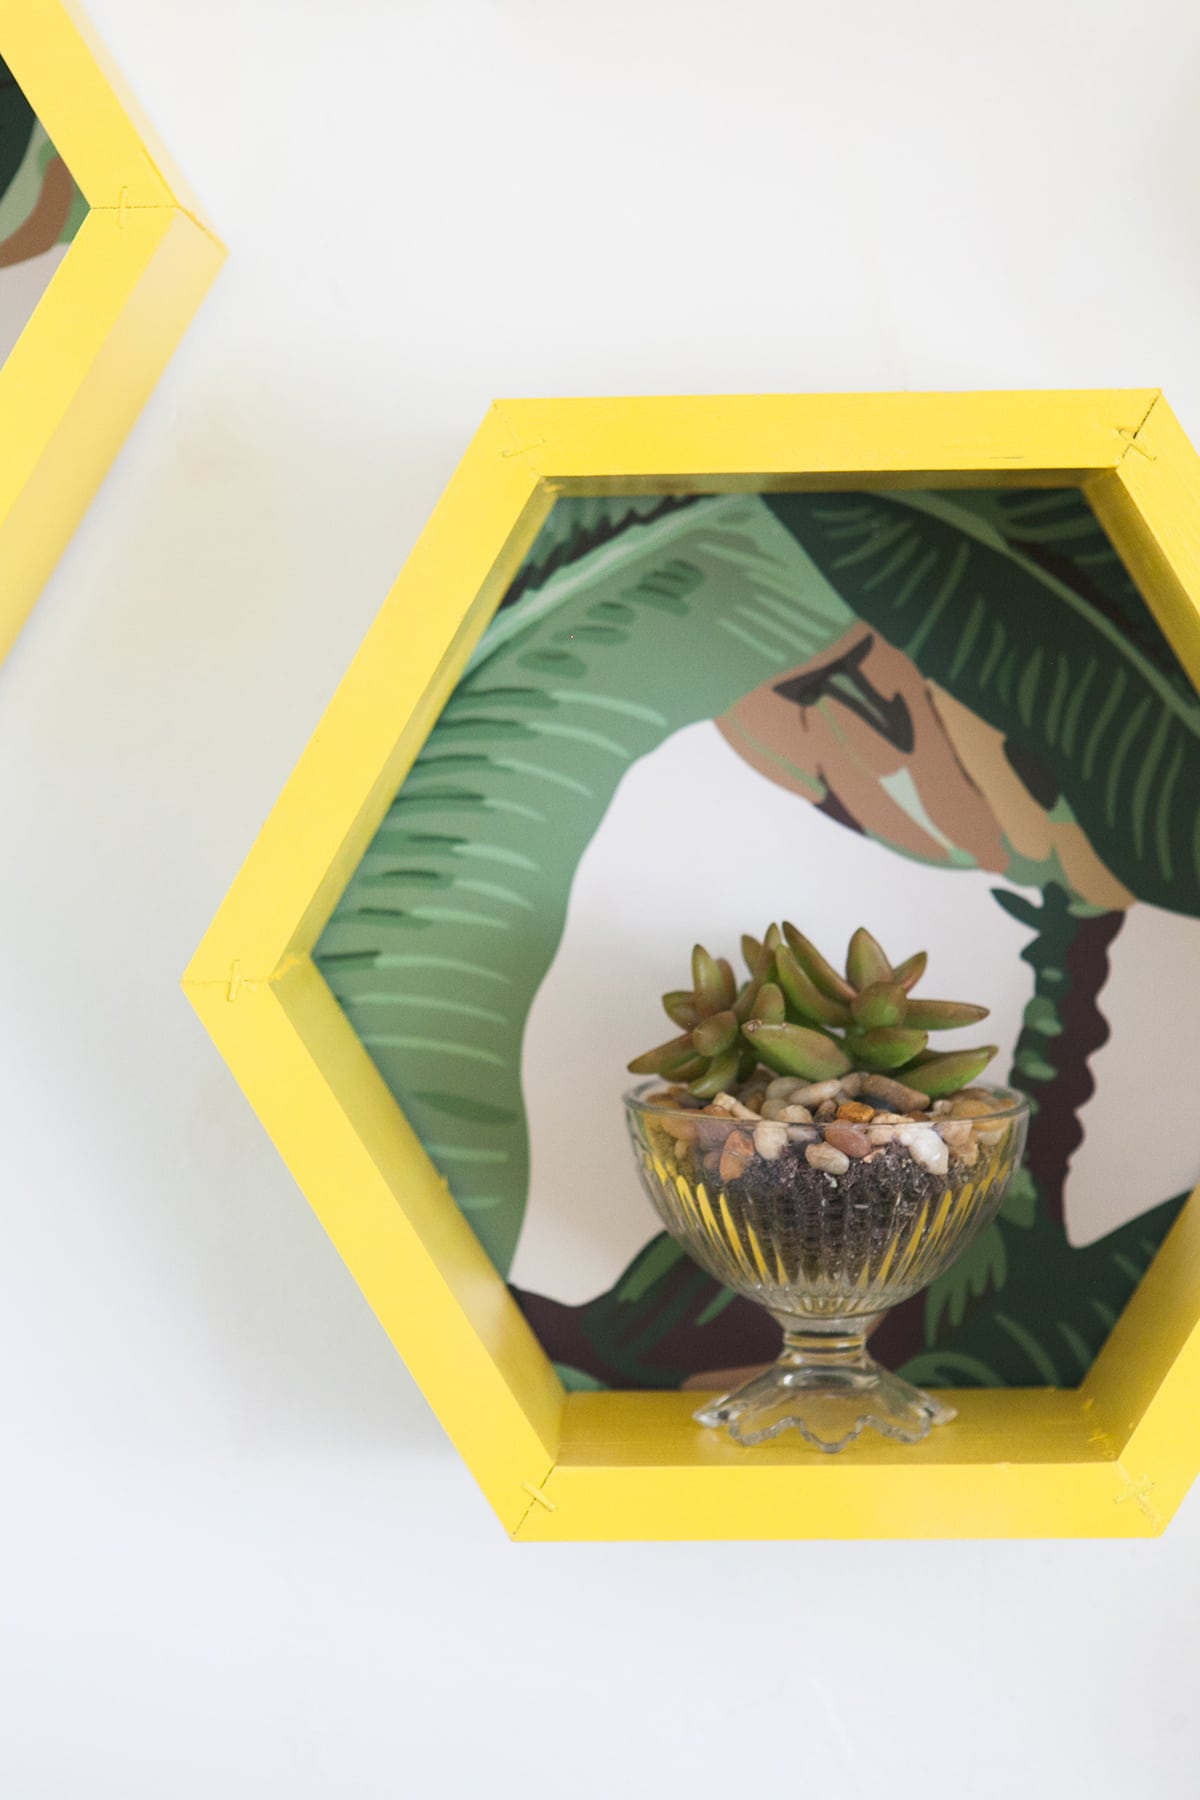
ADD CHARACTER!
On a hunch, I collected the removable wallpaper scraps from past projects to pump up the jam. The wallpaper colors worked well with the colors already in my guest room. Thus forth, striking, handmade DIY honeycomb hexagon shelves were made. Finish the look with potted succulents.
PRO TIP: Cut your wallpaper in different sections to add depth to the design.
I couldn’t be HAPPIER with how these honeycomb hexagon shelves came out. They added the perfect punch of color to a room begging for more. I mean, honestly, who doesn’t need more unmellow yellow in their lives? Nobaaaahdy. You’ll reap so many rewards for doing it yourself. 🤘🏻 On top of that, it only cost Thirty-five. Dollars. $35!!!! Say it wit me!! Compare that to Crate + Barrel’s similar version for $69 a piece! Uhhh, hello. Who’s winning? You are.
RECOMMENDED TOOLS


5 Comments