Before & After: Indigo Bedroom
People, this entry right now is my pride and joy. I waited in anticipation for five months to start working on our indigo bedroom renovation. Finally, just last January, a little blood, sweat, tears and a lotta of vision brought together my biggest and most favorite renovation to date. Meet The Indigo Room.
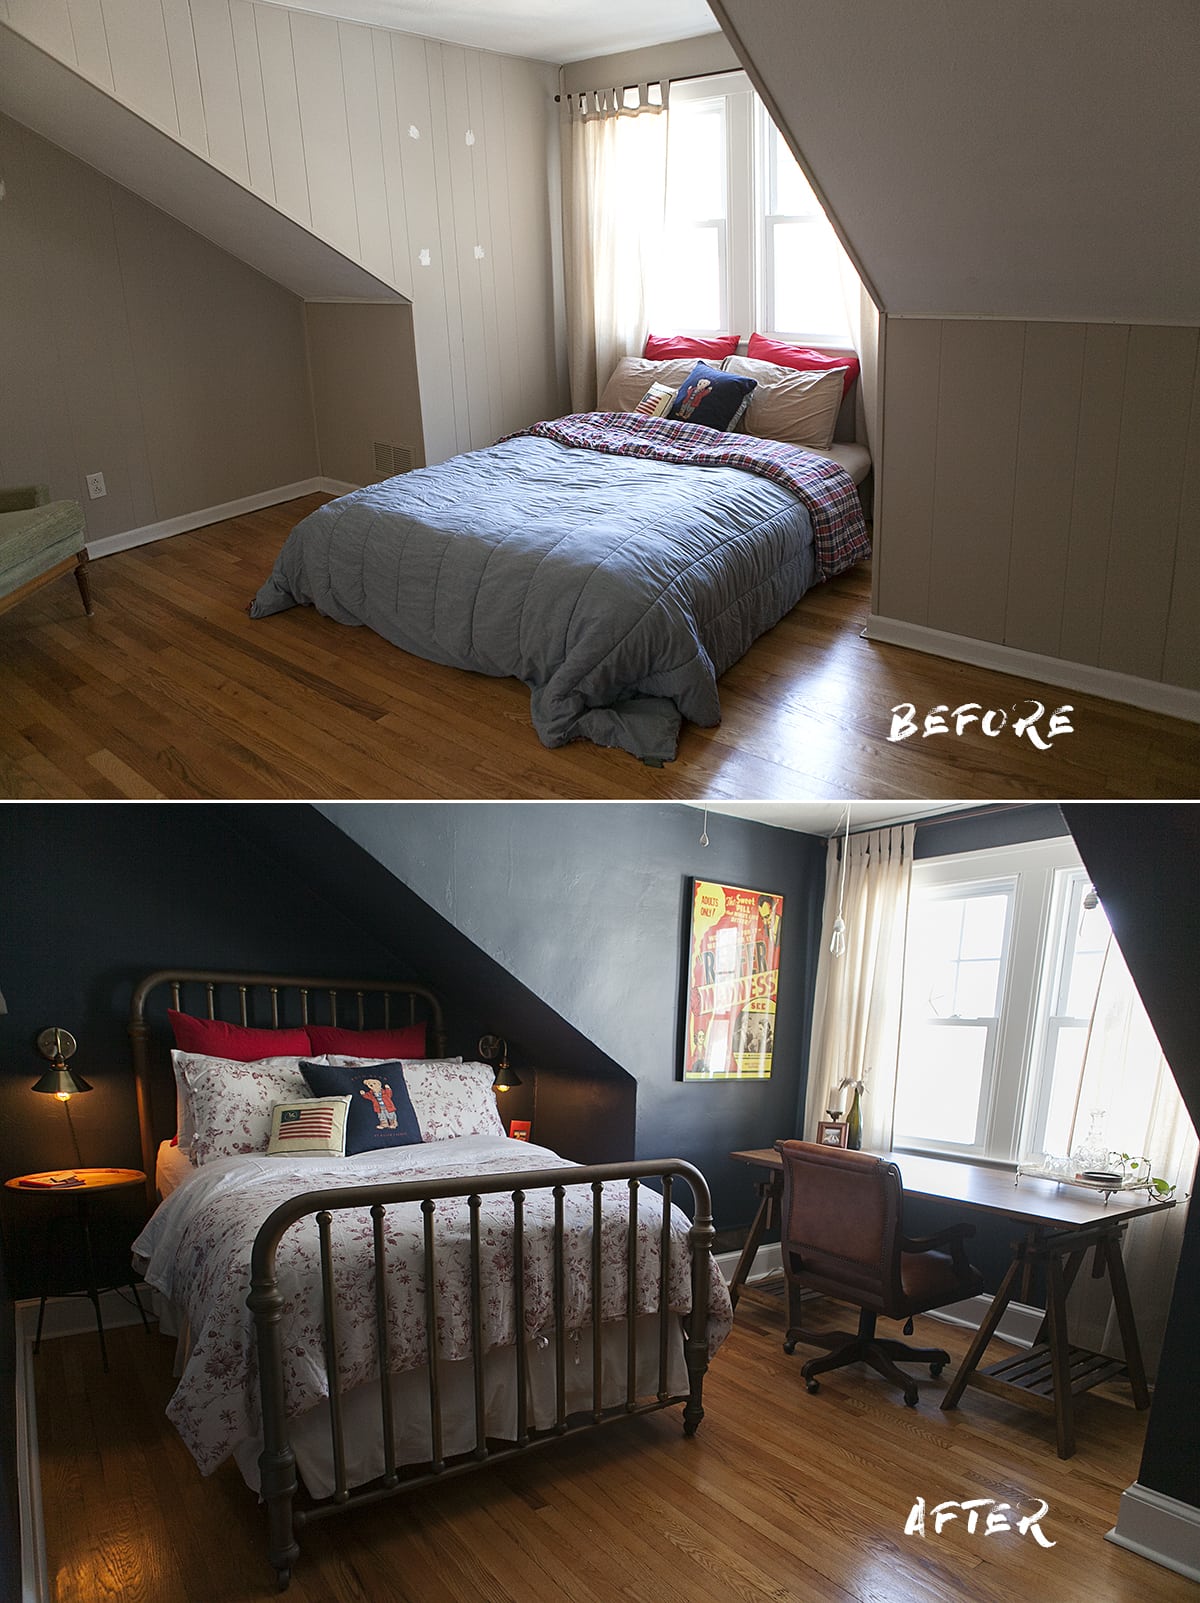
Chris and I bought our 1934 Craftsman Bungalow home two days before we got married in September 2013 (so crazy, but so great!). This style of home is so charming and I adore all its nooks and crannies, and that’s exactly what our somewhat secret guest room is. What looks like a closet door in the dining room leads up to a ton more square footage including our massive attic and an original doggy-dormered guest room.
The guest room was covered head-to-toe in painted wood paneling veneer and the original base molding was replaced with conventional two-inch trim. Was it livable? Yes. Was it acceptable to me? No way, Jose. I love old homes, and I made it my mission to restore this space proper.
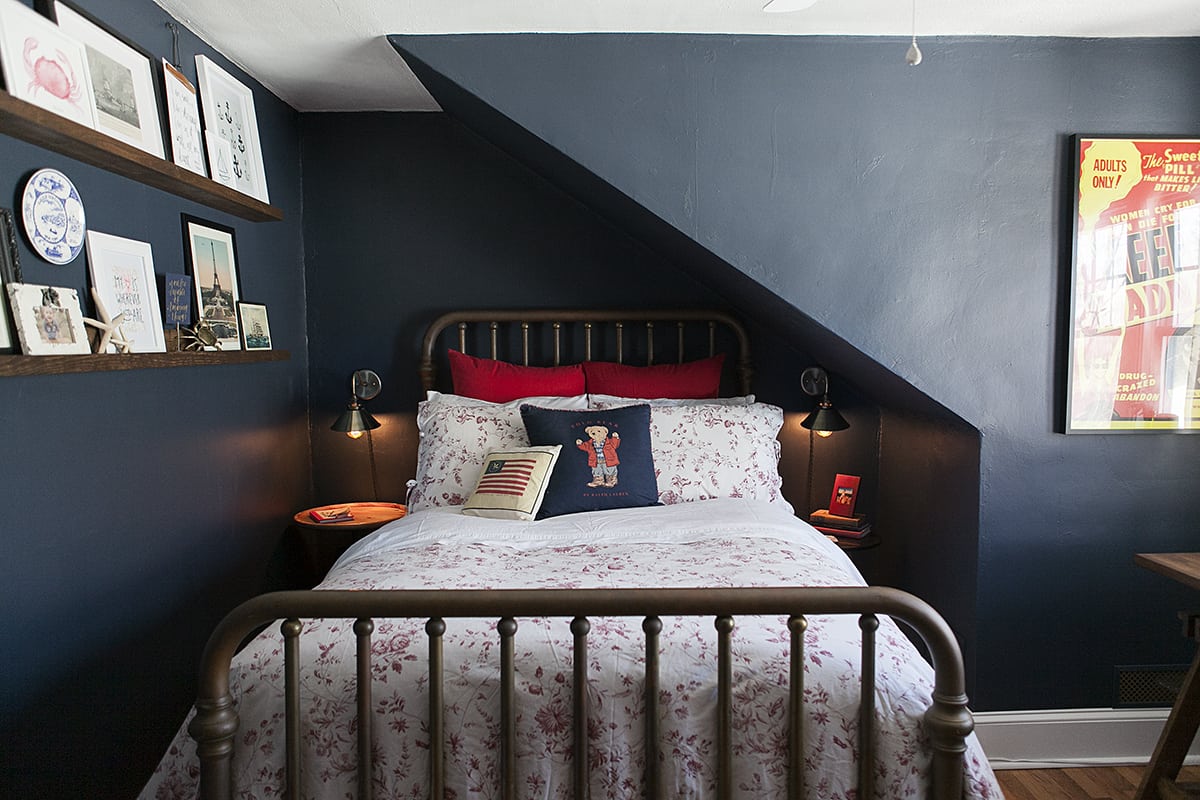
Adorable as she is, she is one tight space! Naturally, I lean toward lighter colors, but something about this cavernous space beckoned for brooding. Once I found a full size brass bed with the prettiest patina, it sealed the deal. The bedframe fit under the dormer to a T, and made the room feel so much bigger.
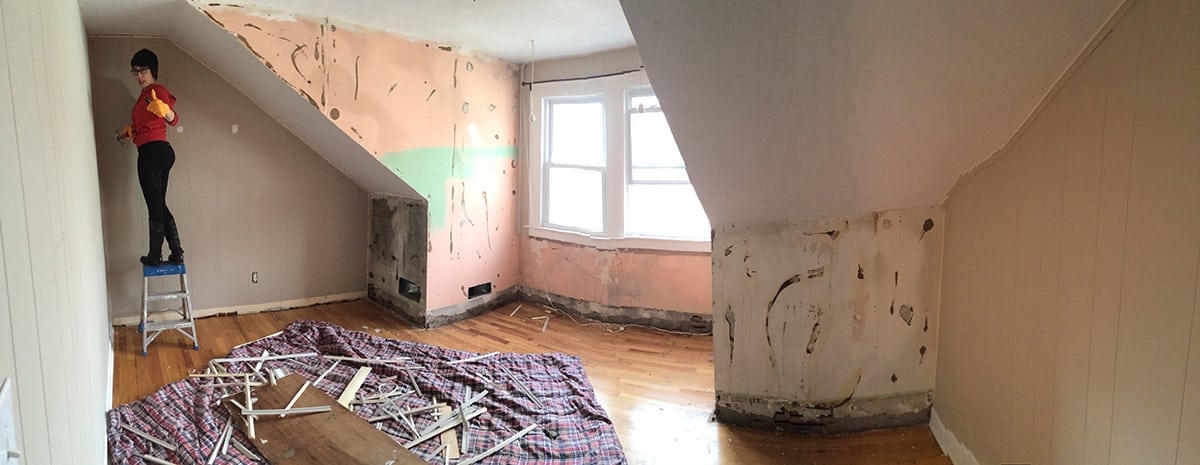
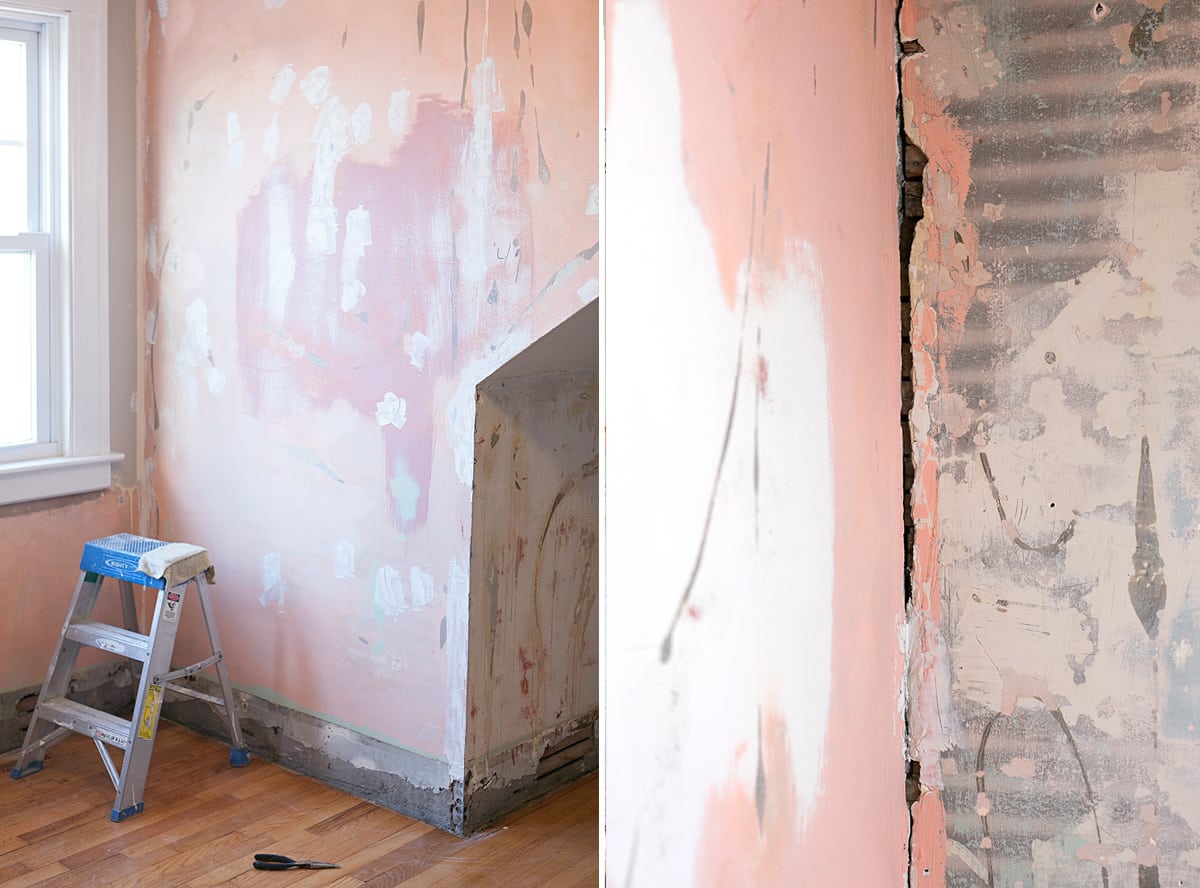
Underneath the plaster revealed glops of adhesive. It was a dirty, dusty job, but my sister and I ripped it all down, nails and all, and tossed everything out the window into a rewarding heap.
Fact: in the 1970s, there was a serious furnace fire that burned up to the roofline of our house. These houses were built so well, it overcame and remain structurally sound (I know, whaaat?!). The fire weakened the plaster corners where the bedframe would abut and seeped charcoal-colored stripes through the lath. We also discovered several colors of paint, and still can’t piece that puzzle together. We sanded, plastered, and scraped the crap out of the walls until they were acceptable for paint, which is Benjamin Moore Hale Navy. It looks like there’s an amoeba every now and again, but that’s charm, right?
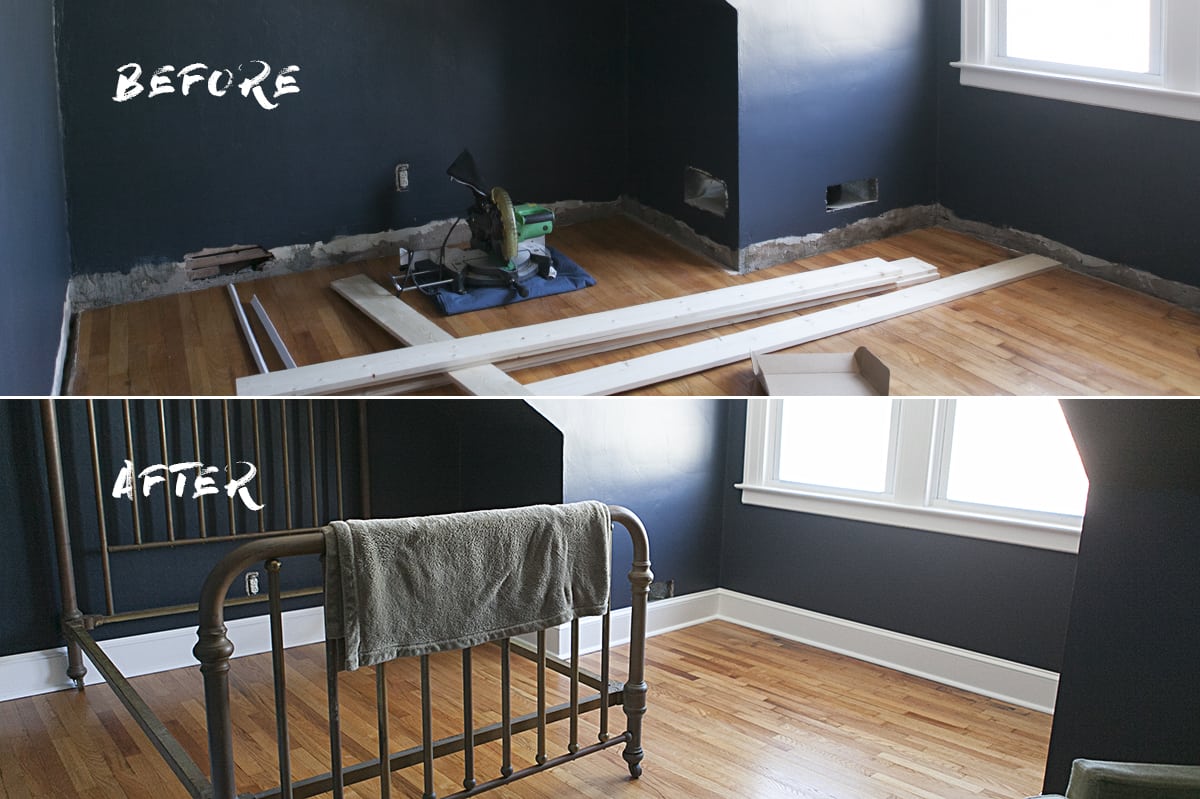
Next up: base trim. With hope and a prayer, I pulled out the miter saw and pneumatic nail gun; measured and purchased a crap ton of wood to imitate the proper trim; and gave carpentry a shot with my own two hands. With my friend caulk by my side, there were only a few fixes and my old-fashioned 6’’ base trim was looking real sharp.
Lastly, I built two custom vent covers with decorative sheet metal to conceal the HVAC ducts as well as two eight-foot long picture ledges to showcase the wall art in the room. The ceilings in this guest room are a foot shorter than the rest of the home, so the wall art brought a much needed height to the space. I also lucked out the ducts were cut just high enough to fit the full 6” base trim without notches. Huzzah!
“Trust me, you can do it.” – Nail gun
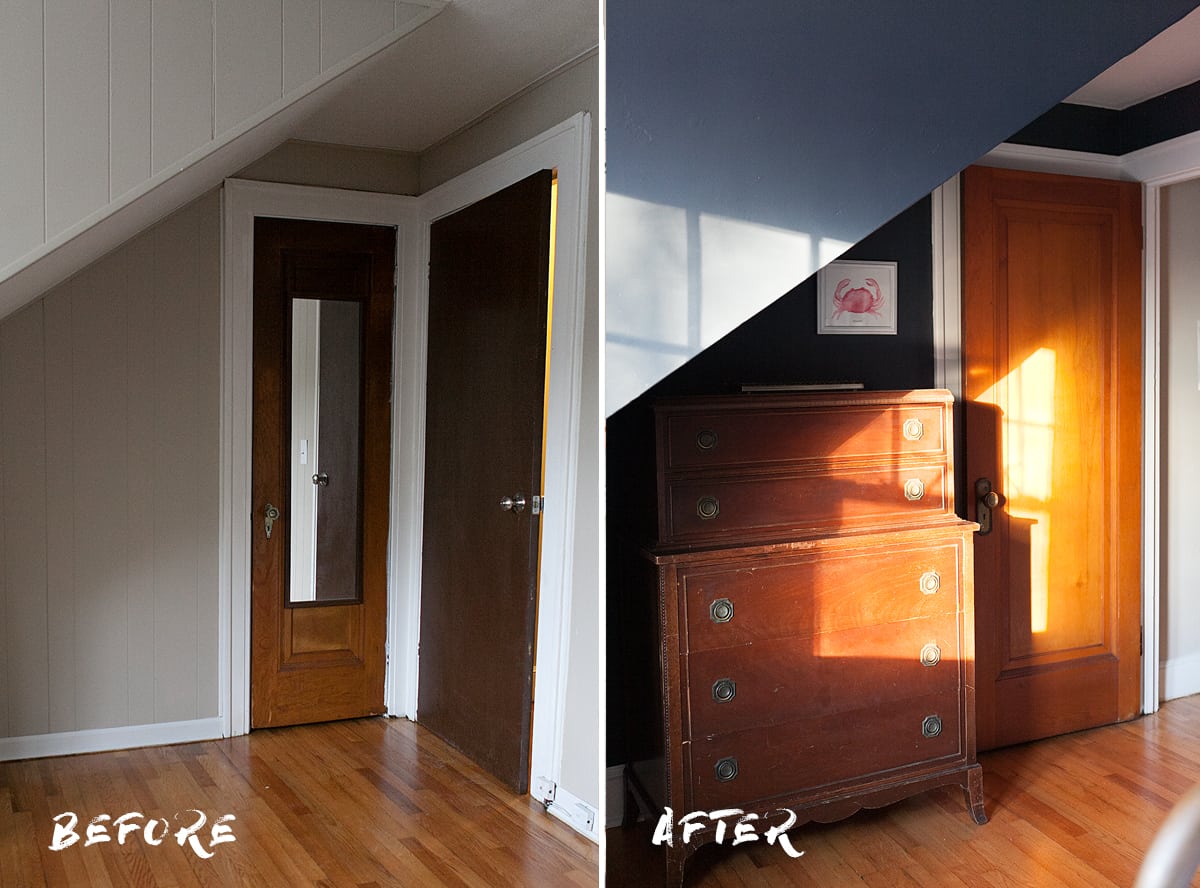
Finishing touches were the best part in this room. I spent a day thrifting at my local goodwill and painting inspirational quotes and sea creatures with gouache, combined with an ever-growing collection of tchotchkes, to make up the gallery of wall art throughout the room. I replaced the shoddy, hollow entry door with an original single panel wooden door from my neighbor’s Craftsman home down the street. The brass bedframe and nightstands I found on Craigslist (or should I say my most favorite place on Earth because it’s still operating like 1995). All I needed to do was build a foundation with furring strips to secure the box spring & mattress, and boom, instantly modernized. The IKEA sawhorse desk was given to me for free by another neighbor, which I previously stained in a dark walnut color. At the alert of my Mother Bear, my best gal and I retrieved the 1920s era dresser, which was out on the curb for bulk pickup (saved, bitches). And finally, what better way to dress up a room than a nice cordial set. We do it classy here, and our guests top off the eve with a nightcap. C’est la vie.

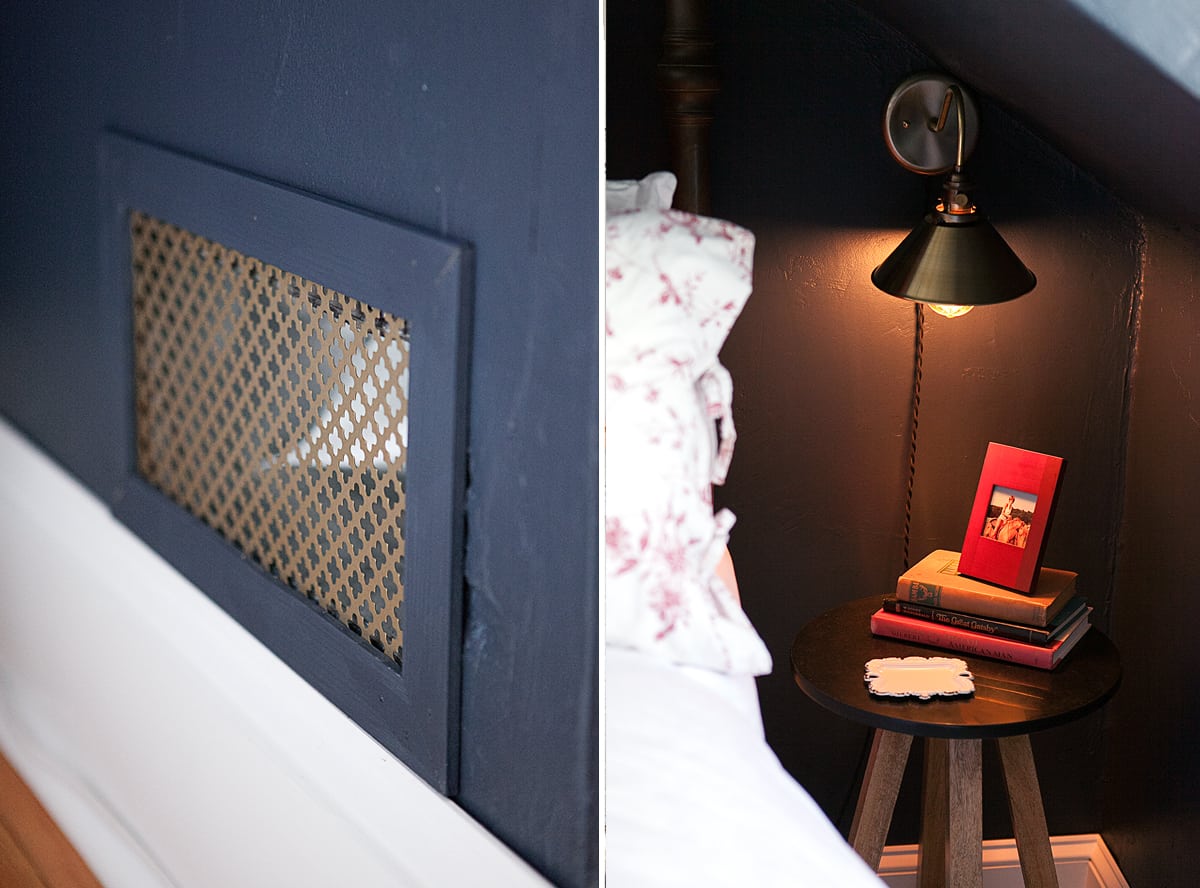
The biggest splurge on this room was a last minute decision: the gooseneck brass sconces. When all was said and done, the dormer was begging for light. I searched high and low and settled on these custom pieces I found on Etsy by Vintage Lights Zone. What an amazing guy; Rafal answered all my crazy questions with patience and grace. I opted for a plug-in version, not only to avoid the hardwiring component, but the antique, twisted cords are pretty much baller status.
My budget for this room was $500, and it would have been just shy over that. The brass sconces toppled my budget, but they were worth every penny!! The total cost for this renovation was $773.
Breakdown of Costs
$280 Paint, Trim, & Supplies
$40 Custom Vent Cover
$50 8’ Picture Ledges (wood only)
$130 Miscellaneous Décor
$48 Ceiling Fan
$225 Brass Sconces
I did make one huge, notable mistake in this whole renovation. Please, for the love of god, take the time to put paper down to protect your wood floors. It didn’t occur to me until it was way too late. Luckily, there’s little foot traffic in the guest room, so the love marks caught the room up to the rest of the house.
I am absolutely freaking smitten with the way this room came out. It’s my first foray in the world of moodier colors, and let me tell you, I’m hooked. Keeping the ceiling white helped to balance out the darker walls and I love the pops of red throughout the space. Sometimes things come out better than you could have ever imagined!