Classic Black & White Bath Revival | THE REVEAL
Traverse with me into a rediscovered Hollywood Regency 💃🏻 The Brigham Bath has been officially restored to its original glory with a modern-day twist plus natural sunlight, the likes of which this commode hasn’t seen in a millennia.
Before we dive deep into this full-fledged restoration effort, let’s take a stroll down memory lane at where this bagño began as well as the dreamy design board:


Once upon a time, this 1934 Craftsman Bungalow’s petite five-by-eight-foot bathroom featured a trademark black and white tile design. Somewhere down the line, a cute yet cookie-cutter renovation left its retro footprint in the dust.
Fortunately, the community on this street is strong and many of my neighbor’s homes were built by the same architect. Each home features various aspects of the bona fide design; and with those pieces of the puzzle my commode’s restoration effort was forged.
Here’s a few snapshots of the homes on the block featuring the OG tile design:


THE TILE DESIGN
To recreate the landmark look, I knew exactly who to turn to. Longtime partners and purveyors of a tremendous tile collection, The Tile Shop possesses every tile style a heart desires—and they’ve got classic down to a T!
With my design in mind, I sifted through the stockpile and successfully finalized this restoration dream of mine for eight years-time.


In the wall design, I sought to take the black-bordered top cap to the next level. Like the original, I carried half walls throughout the entire bath with the addition of extending the tile in the shower from floor to ceiling.
The glossy and bright white 3-in. by 6-in. subway tile provides full coverage for a daily wash and brightens up the entire room.

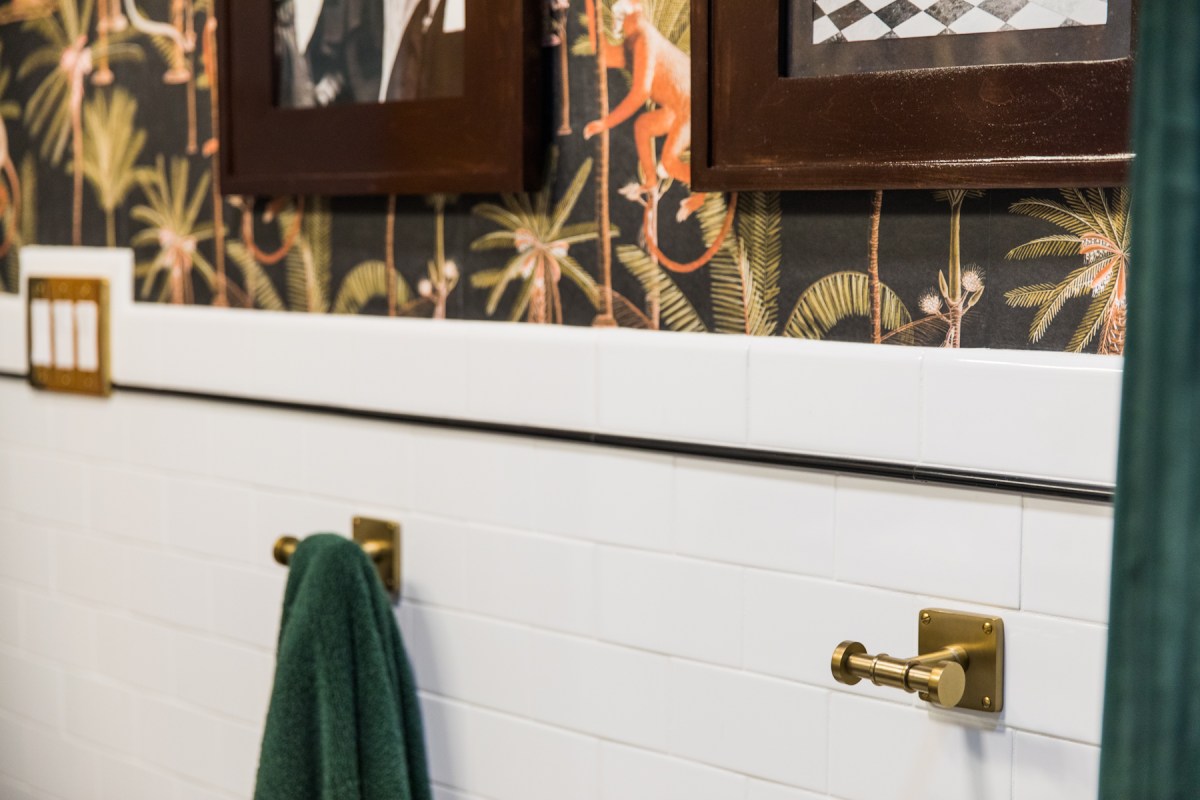
In lieu of a black bullnose, I lightened up the top cap with a white bullnose and a sleek af black pencil that carries throughout. Quite possibly one of my most favorite features; the pencil tile instantly draws attention to the high ceilings and striking statement wallpaper.
Utilizing these key aspects make the whole room present much larger.


All walls finish with a contrasting, subtle yet swanky polished marquina marble skirting, the baseboard it was always meant to be.
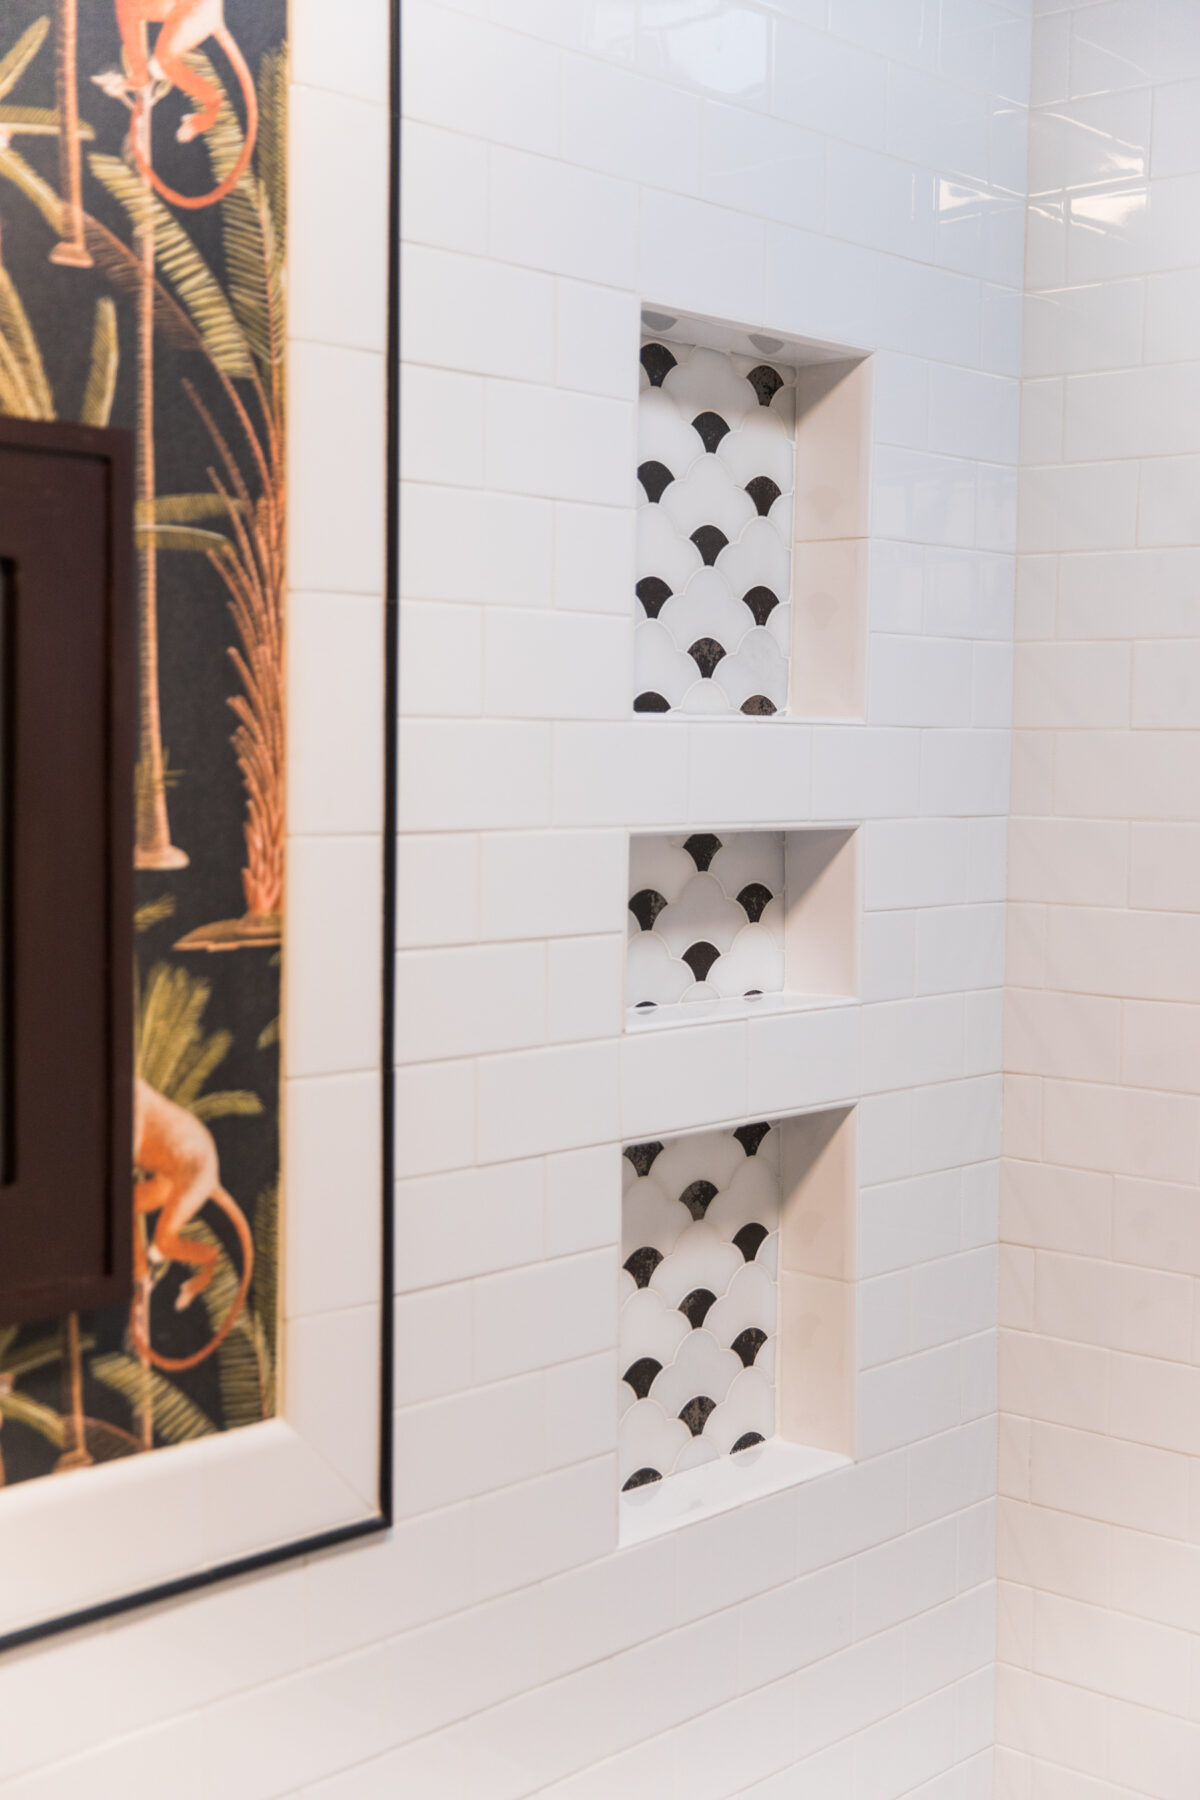
The black accents are complimented in the custom, three-shelf niche, a stud cutout design my contractors nailed. Well, they nailed everything. More on that soon.
The vintage-inspired cloud mosaic adds just enough spunk and a touch of shimmer to the shower area.


It’s all tied together with a variegated carrara hex marble floor. At first, I planned to incorporate a black hex border and lettering (see design board). After previewing in-person, the black border diminished the impact of the black skirting and got the ax straightaway.
So glad I went with my gut instinct, and now she’s just like the OG. Best choice ever.

HIRE A DAMN GOOD TILE INSTALLER
Can we talk about the craftsmanship on all of this tile? Tiling is no easy feat. It takes time, a boatload of prepwork, checking math, then checking it again (and again) to ensure perfection in the result. That’s precisely what my guys at PCG Home Improvement do.


Take a close look at the details: there’s not an odd-cut tile to be found. The floor to ceiling wall finishes with a full tile; the niche shelves were planned to ensure a full tile crossover; the seamless corner weaving technique; and holy sweet baby cheezus, look at that switch plate framing!!


This area was a bit of a conundrum, especially since the specific half wall height was important to me. The switchplates needed to properly rest across the tile without any gappage (new industry term). Thanks to Nick & John’s genius, the result is one million percent brilliant.
Connecticut local? Heed my words and hire them!!
SHOP THE POST
IT’S ALL IN THE DETAILS
First off, how marvelous are these palm tree climbing monkeys? I saw this wallpaper and dropped dead. It fulfilled my craving for everything Hollywood Regency and, I mean, look at all those monkeys!!
There’s a silly sentiment for me, too; my Mama’s lifelong moniker for me is monkey. ‘Cause when I was just a tot, I habitually climbed all the trees a lot-a lot. 🐒

The pedestal sink from the former rendition was desperate for functionality. To make up for a lack of surface area, I’d thrifted a cute side table to house everyday items and a rubbish basket.
The wall-mounted gold metal frame vanity solved all of these issues. It’s six-inches wider and the high-gloss ceramic basin features a cleverly compact sink combined with optimal surface area.
The open shelving is great for a couple of woven baskets providing bonus yet stylish veiled storage.

Touching on the metal base for a moment, this vanity can display hand towels two ways—tabletop or rack. Speaking of the rack, I’d taken a chance on an “over-the-tank” toilet paper holder, which ended up fitting like a freaking glove on the frame. Floorspace so saved.


Boasting form and function, the vanity is accentuated with an oversized round mirror, 5-globe opal shade vanity light, and all the gaudy glam a gold-lovin’ gal could ever desire. Like my repurposed wall-hung soap dish, the art deco reproduction switch plates as well as a thrifted hand mirror and mini jewelry dish.
AHEM, AND HELLO SWAN FAUCET!! I can’t get over how close this is to the swan faucet from Billy Madison. D-E-D, dead. ☠️

THE SHOWER AREA + LESSONS LEARNED
Speaking of gold accents, the shower area is brimming with all the brass. The exposed rainfall head shower system comes with a tub spout and is rather easy on the eyes. I’ll never leave the hunter green velvet shower curtain closed, which looks magnificent draping on either side.

One item I had difficulty finding was an old-fashioned, oval shower rod in just the right size. Also, it would distract the glorious shapely soaking tub view. I decided to suspend a thick af gold curtain rod with clip rings from the ceiling, drawing attention upward adding a much desired glitz n’ glam.


The custom velvet curtain comes with a waterproof fabric liner, which tucks away nicely and blends in swimmingly with the glossy white tile surround. And, of course, there’s hunter green in here. I basically bleed green.
Learning lesson alert 🚨 The freestanding bathtub proved to be quite the riddle for two reasons. First, the flexible drain pipe. This style of drain is complicated to connect and took several hours (and my plumber is the ish).
What I saved on the cost of the tub cost me later in labor. She’s a real beaut though, so I’m not mad about it. Just a heads up to my fronds.

The second lesson was spatial. I may have gotten a little big for me britches (yes, that was an Irish or Scottish accent; I’m never sure) bringing in a curvaceous freestanding soaking tub to a petite bathroom.

In spite of its flawless fitted look, it did make caulking a bit tricky. Thankfully, my plumber accepted the help of my five-foot-awesome-long arms to squeeze back there, ensuring the tub was centered and the backside fully waterproofed. Teamwork makes the dream work!!
On the other hand, a linear (versus curvy) tub would have helped tremendously. My guy also recommends at least a foot on all sides. I say hey; no risk, no reward. 😂
SHOP THE POST
SALVAGING + COLOR COORDINATED HICCUPS
In planning the Brigham Bath, I salvaged as much as possible. I’d hoped the original marble hex floor still existed (like the artifact I unearthed). Much to my dismay, it was all gone.
Serious question: who does that? And WHY?!!

Moving on, I’d also hoped to salvage the old toilet (or ter-let as my I-ty grandma would say). Taking a chance at blending ivory and white tones, I quickly learned it’s notta good fit. On the upside, the old toilet and pedestal sink were donated to ReStore. Waste not, want not.


The concealed cabinets were inherited with the home and total keepers. A fresh update to the wood picture frames with a top-notch stain and high-gloss poly added depth and texture. I was going to paint them black, but the espresso brown stain was way better. Worth the extra work.
THE BEST DOOR ON THE WORLD WIDE WEB
At least in my mind. The very first door I ever salvaged for the Brigham Craftsman was meant for this very pocket door. I’d spent several years searching high and low for single-panel interior doors to replace a series of hollow, six-panel doors (eight, in fact) to revive the true Craftsman look.

This pocket door was the last on my list to replace. With the creative brains of my amazing contractors (cannot emphasize this enough), we turned this beat-up, UV-damaged, found-in-an-old-basement in Westport, Connecticut, swing door into a one-of-a-kind, frosted glass door accessorized with alluring brass hardware to boot.

Saving every inch of trim (ahem, aaamazing), this pocket door looks like it was born this way. This door most certainly was exposed to significantly different levels of sun causing differing UV damage on both sides—one dark brown, one honey orange.
Since all pieces were salvaged, I followed suit with two stains (‘sup to my homeslices at ZAR)—Dark Chocolate Truffle and Premium Teak. The colors pair so well with their coinciding sides. As the old adage goes, if ya can’t beat ‘em, join ‘em.
The frosted glass is actually called “acid-etched,” which is a technique rendering a tempered and translucent pane. The glass was purchased from my local glass purveyors and ready for pickup within ten days.

Third time’s the charm when it came to the pocket door lock. The door had to be ripped down on the lockside, which made the first one moot. The second was just too close for comfort in terms of the glass. The third was a traditional swivel cabin door hook, which turned out way cooler than expected. Hubby’s favorite feature. 🤪
Finished her off with a bitta custom gold leaf lettering, and this bathroom entry is finìt!

SHOP THE POST
AND THE LAWD SAID, “LET THERE BY LIGHT!”
The Brigham Bath once featured a lovely little window, but was covered up when the basement walkout (now mudroom) was built.
Desperate for the sun’s unbeatable rays, I incorporated a 10-inch tubular skylight with a prismatic diffuser. The amount of light this light tube provides is exactly that—totally tubular! It’s simply striking how the natural light permeates the frosted entry door.

IN CONCLUSION
This black and white bath revival may very well be my best restoration to date. I’m obsessed with each and every detail and there’s so many more worth mentioning—the double hook towel holders great for company, the shiny mahogany toilet seat, the brass open shelving, the black marble wastecan, all of it!
This bath is wham, bam, thank you ma’am kind of glam. Just how this chick likes it.


What’s your favorite aspect of the Brigham Bath?
Let me know in the comments below!
This post is sponsored in part by The Tile Shop, Burke Decor and Clare Paint. All experiences and outlandish commentary are my own. Incredibly thankful to the great companies who continue to support this online magazine.
THE TILE SHOP
Subway Tile
White Bullnose Tile
Black Pencil Tile
Black Marquina Marble Tile Skirting
Harlow Cloud Mosaic Tile
Carrara Marble Hex Tile
Marble Threshold
BURKE DECOR
Barbados in Anthracite + Green
CLARE PAINT
Blackish
ADDITIONAL SOURCES:


I can’t pick a favorite part because I LOVE all of it!!! Truly beautiful in every way!!